Architectural juries exist in all architecture schools all over the world. The evaluation system for students of architecture is based on the jury. But what is a jury? Here, students pin their designs on walls in front of other students of the school, the faculty (internal jurors), and sometimes there are also star architects or other architecture faculty members from other universities (external jurors). Students try to explain their designs, and after their brief, the jurors start their criticism.
A jury poster is an essential element for attending the jury. To attend a jury, you need two things: a jury poster and a physical model. The jury poster contains your conceptual brief, graphical elements, technical drawings, site diagram, building performance data, rendered images of the design, and so on.
To pass a successful jury, you need a clean, readable, and beautiful poster. But it is not so easy. Especially for beginners, it becomes more difficult. It will be a common scenario if your PC or software crashes due to a large file and you lose all the work done at once, and you have to start from the very beginning. Or you made everything okay, but when you print it out, everything becomes faded and unreadable, and colors are inaccurate. These all happen due to your lack of experience.
In this post, I am going to highlight the 10 most important things to keep in mind if you want to come up with a stunning jury poster.

1. Size & Orientation:
First, you need to consider the poster size and orientation before starting the design. Most of the time, it will be determined by your professor. It could be a single sheet or a collection of sheets of small size (A1) that act as a single sheet. In the first couple of years when you are not very senior and the projects are not that big, you will need to compose a single sheet. When the project becomes big, it needs more sheets than one. Then there is the technique of adding small sheets to make a big one. So, you need to determine the size and orientation first so that you can start the design.
2. Determine The Paper Quality:
Next, you should determine the paper quality because the overall poster quality is heavily dependent on it. Many schools have their specific requirements, but in others, you will get some freedom. Most of the time, architectural jury posters are made of offset paper, which is very good for black-and-white schemes and CAD posters. But in the case of color, it gives something faded and light in color. High-quality PVC sticker paper gives a much glossier and clearer color. For that, I recommend a PVC sticker over offset for color print. But it also depends on your budget.
3. Planning:
Now it’s time to start planning. But planning for what? It is always good to follow a path for your overall jury presentation to explain your design. This path also has to be demonstrated on your poster. You have to plan which section you are going to start your jury with and which you will finish with.
Most of the time, we start our jury by describing our concept and design goal, so it should be at the start of the poster, I mean the first left side. Then we explain the ground floor and next other plans. After that, we explain elevations and sections. Then we show the building performance results, and lastly, we show some render images. That means these elements should be placed gradually next to the concept. You need to plan this sequence according to your needs.
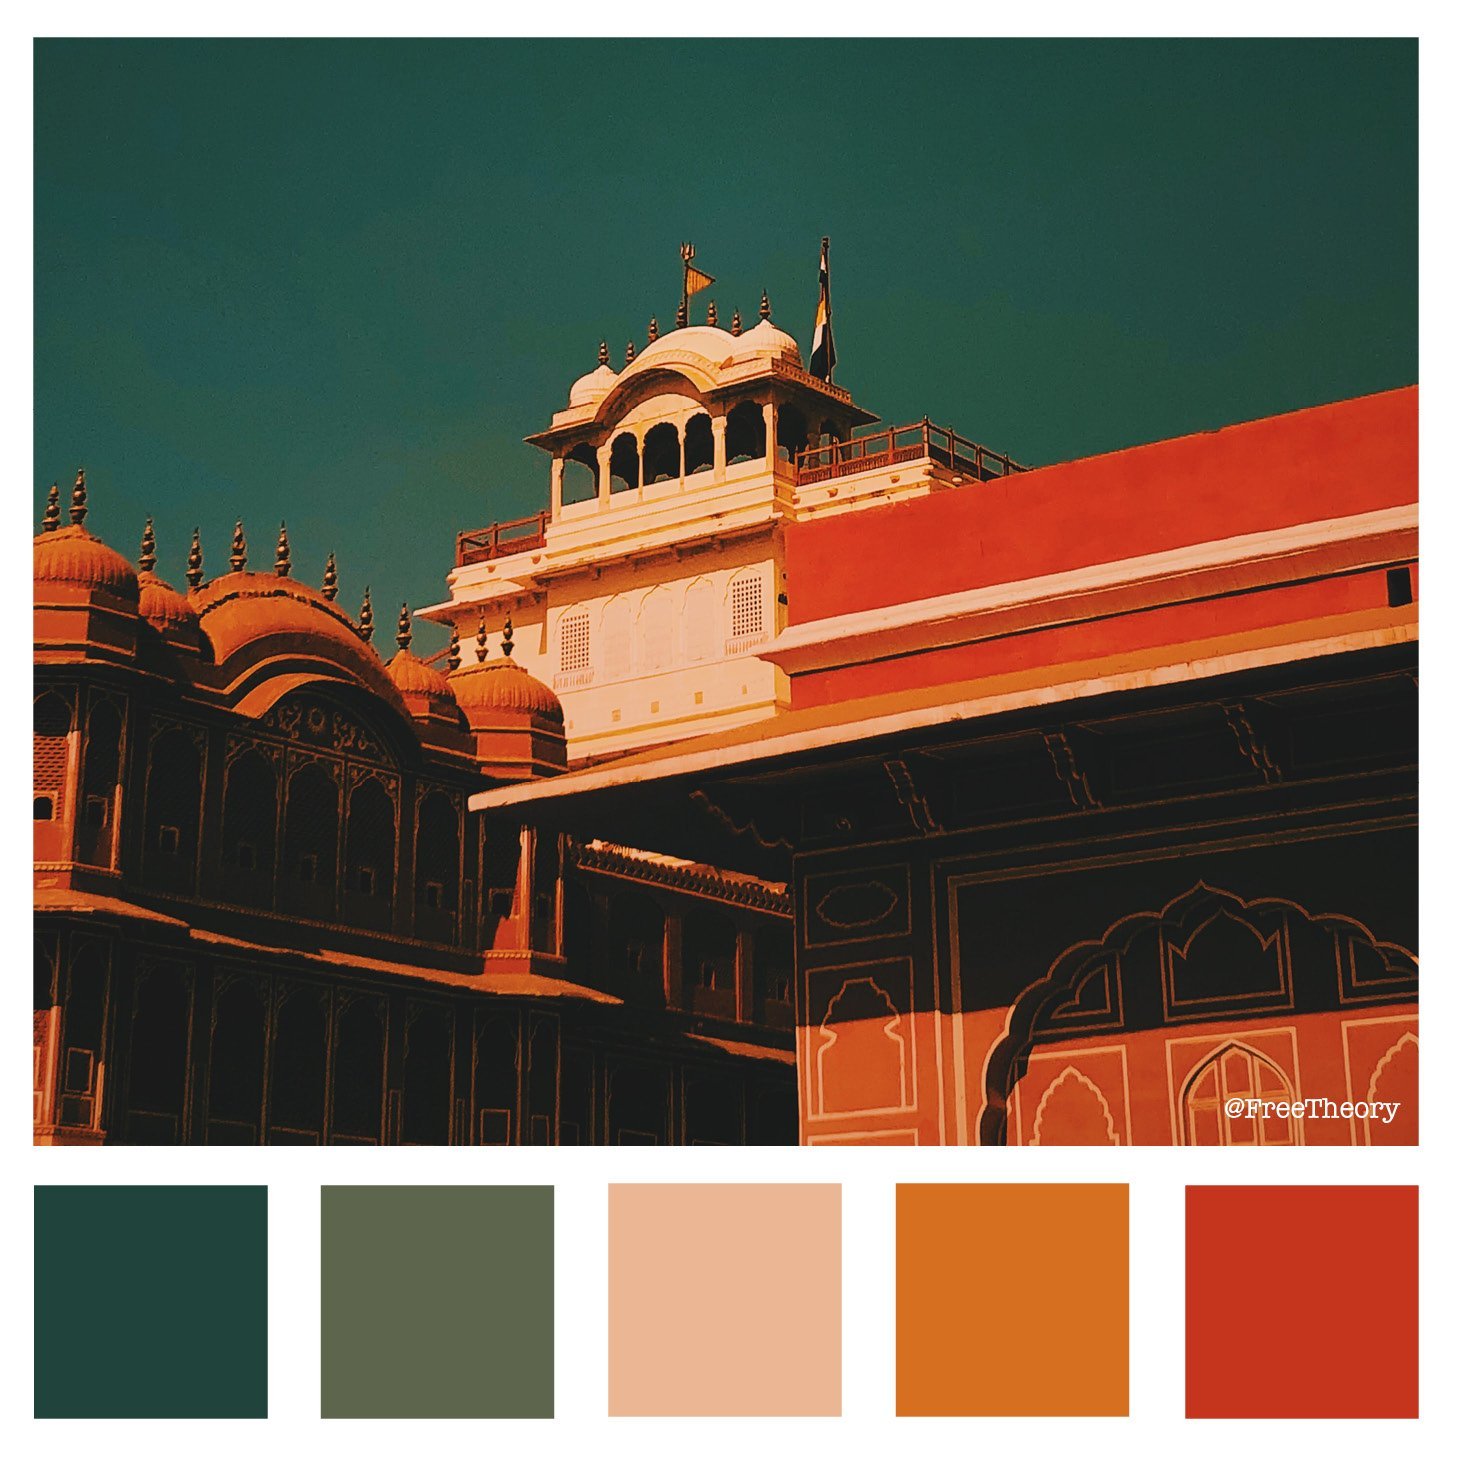
4. Color Scheme:
You have to fix a color scheme for your poster to make a great one. The scheme you will find from your concept and theme. It makes your poster more mature, united, and consistent.
You can use a black-and-white scheme or another color scheme as you need. You can also color your background according to your scheme or keep it white as you need. But most of the time we keep it white because it reflects the original color of the design.
5. Graphical Elements:
From my experience, I see that professors give more appreciation to artistic graphical elements. So try to make your graphical elements like diagrams, conceptual sketches, and render images a little bit artistic. You can also go with the photorealistic approach as your theme.
6. Tools:
Adobe Photoshop and InDesign are widely used for sheet making. Graphical elements are made in Photoshop and overall sheet composition is done in InDesign. You can also use Photoshop to compose sheets, but here you will face trouble because of the larger size of the file.
You have to set the resolution to 300 dpi for printing and color to CMYK rather than RGB. Because in printing, CMYK is used. If you select RGB, the accuracy of the color will be lost and if you set down the resolution to less than 300 dpi it will affect the readability.
7. Readability:
You should make all your graphical elements and text in such a manner that they contain proper readability. Because jurors will experience your poster from a certain distance, it should be properly readable from their seating position. Your topmost small text should be readable from their seating position. From my experience, I can say you can use a minimum of 11 sizes for your text to be readable.
8. Minimum Text:
It is always appreciated to use minimal text in your poster. Replace text with graphical elements and icons where possible. Graphical elements are more interactive than text. And believe me, no one is going to read your text on your poster, so do not waste your space in the poster by putting text. One graphical element is equal to thousands of texts.
You shouldn’t use more than two fonts. You can use one distinct style only for the title and another for the body text. Bold and scale can be used to create a hierarchy in the text.
9. Keep Backup:
It will be horrific if you are almost done with your work and the deadline is almost here. The file will become very large and your PC is already struggling to handle it, but suddenly your Photoshop crashes! Believe me, Photoshop is one of the best real software, but it could crash at any time if the file becomes very heavy.
You probably think it happens sometimes but sadly it can happen any time. For that, you need to be ready for that situation, otherwise, you will destroy your jury and it will cause your failure in design.
To be ready, you need to keep a backup of your file after every day of work. The duration between keeping backups will reduce your work pressure gradually. At the moment you have to back up your work whenever you do something or edit your poster.
But suddenly you notice you have a lot of backup files and you can’t identify the latest one. To overcome this problem, a great idea is to rename files with the date and time and delete the previous file. Thus it will save more space on your drive. It is also helpful to keep backup files on a different drive than your main file.
10. Save File:
It is another hassle that you might find in the printing press there is no support for all formats of files. It is safe to talk with them before your final save. In my experience, I found (.tif) file support in our printing press. Always try to take a light version of your file with you when going to print it. Bring three formats for safety (.PSD, .tif, PDF). So, you can use whatever you need.